
In an effort to continuously enhance communications with residents and businesses, the City of Lakewood is encouraging the community to register for the Cuyahoga County ReadyNotify System. The ReadyNotify system is provided by the County to participating communities to send important messages to residents.
The City of Lakewood is utilizing the system for limited Public Works emergencies. This includes emergency water main breaks, snow bans, and emergency refuse changes. Messages from the City of Lakewood will be limited to emergency declarations and other information deemed necessary to inform residents and businesses about local conditions. Every effort will be made to share information between 6:00am and 10:00pm.
If you have previously registered for the ReadyNotify system, we are asking you to re-register. Re-registering is vital for current users to ensure that the system has accurate contact information and to enable added functionality and features.
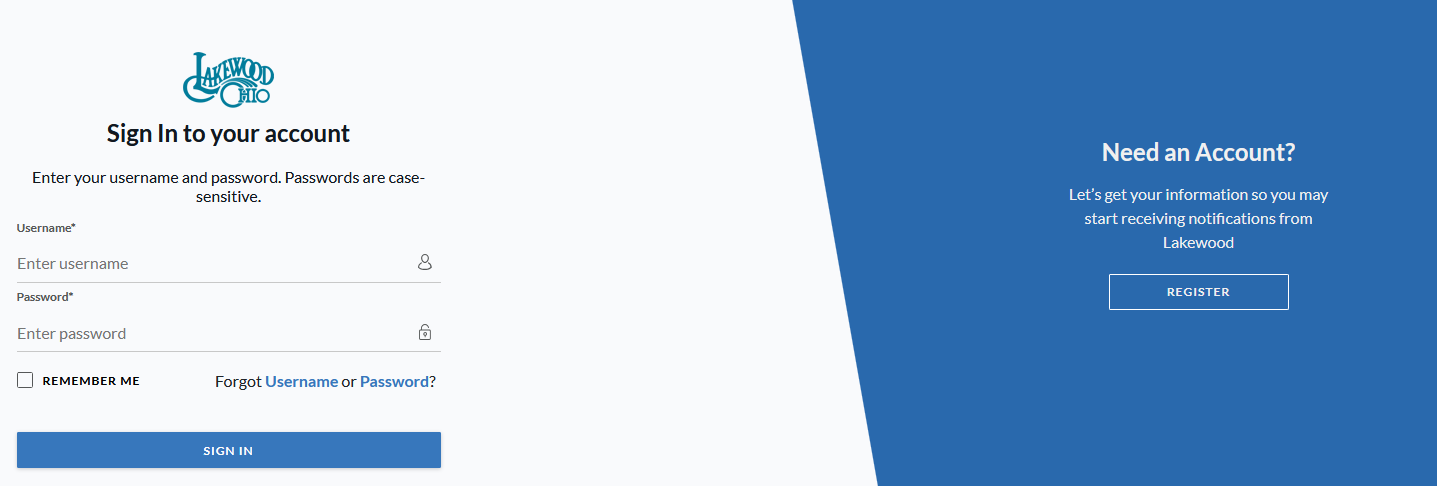
To start, visit accountportal.onsolve.net/lakewoodoh. You will be taken to the login/registration page. Click the “Register” button on the right if you have never signed up, or you can sign in using the Sign In form on the left.
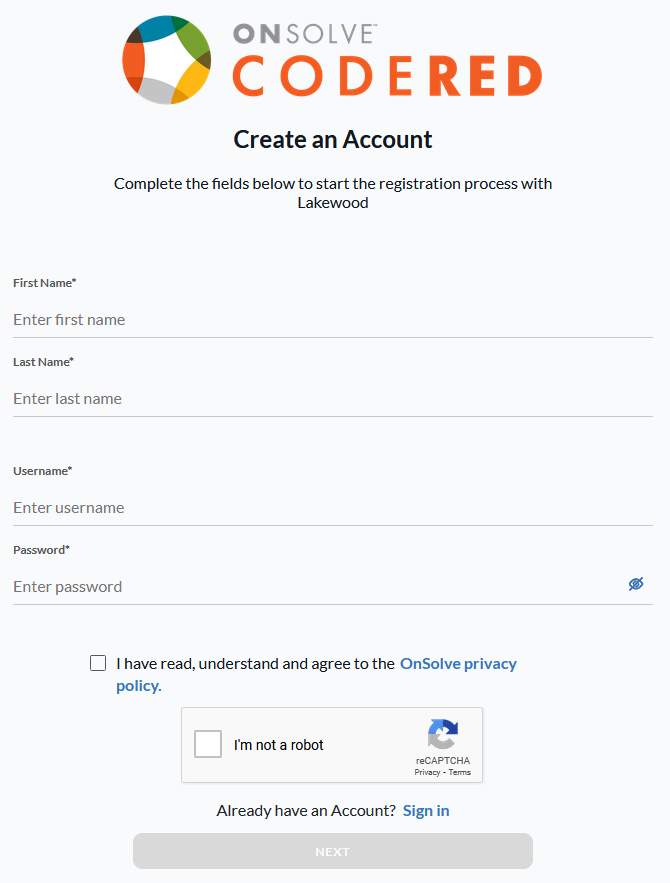
Next, enter your First Name and Last Name, and choose a Usernanme and Password. Then, check the boxes for the Privacy Policy and the “I’m not a robot” reCAPTCHA.
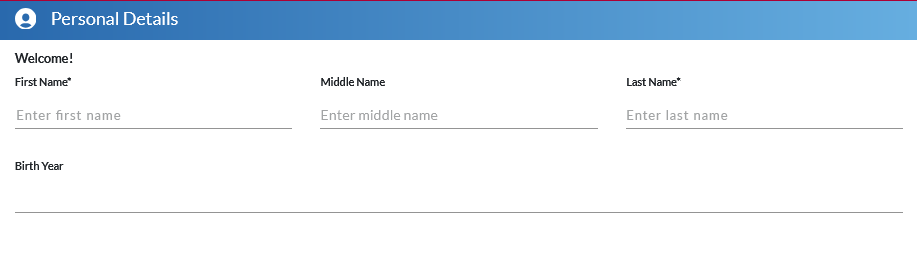
After choosing your username and password, you will be taken to a screen where you will fill out your personal details, preferred communication methods, add your home address, and choose your alert preferences. First, make sure that your name is correct. First and last name are required fields.
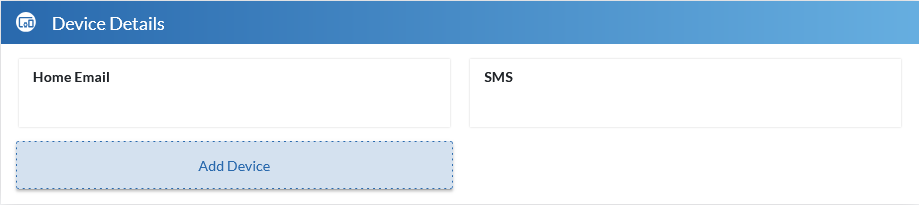
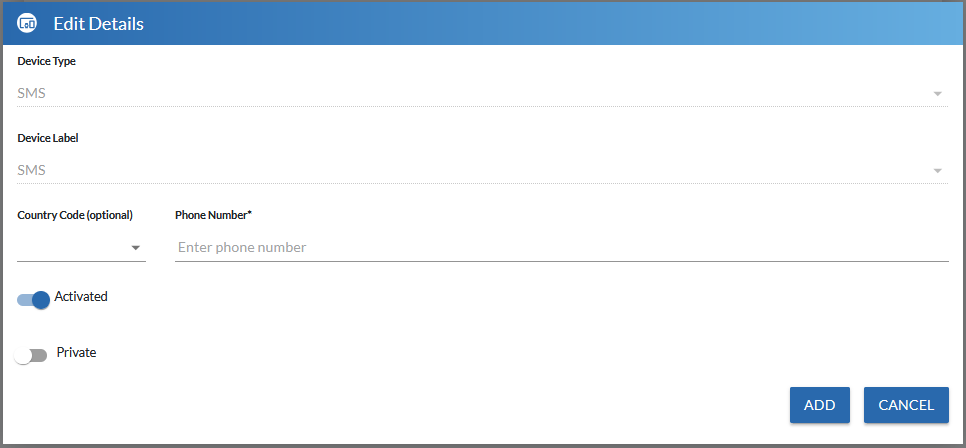
Next, you can add your phone number to receive phone calls or text message alerts. Click “Add Device,” and in the dialog box that opens, enter your phone number. If you opt into text alerts, the phone number must be a mobile phone.
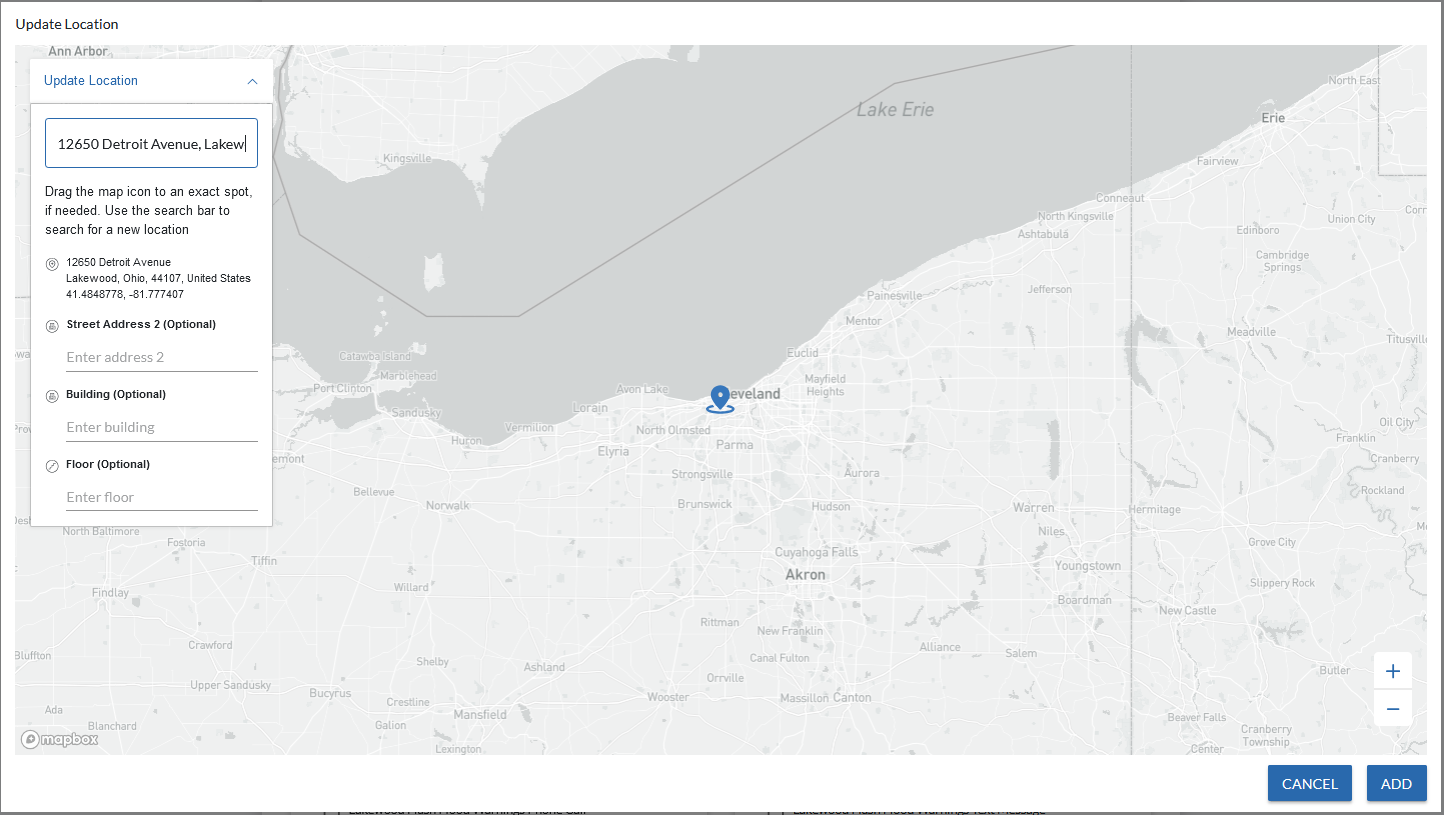
Next, click the “Add HOME ADDRESS” button, and in the dialog box that opens, begin to type your address. Search results will automatically pop up; you can then click your correct address. Click “ADD” in the bottom right corner to save your address.

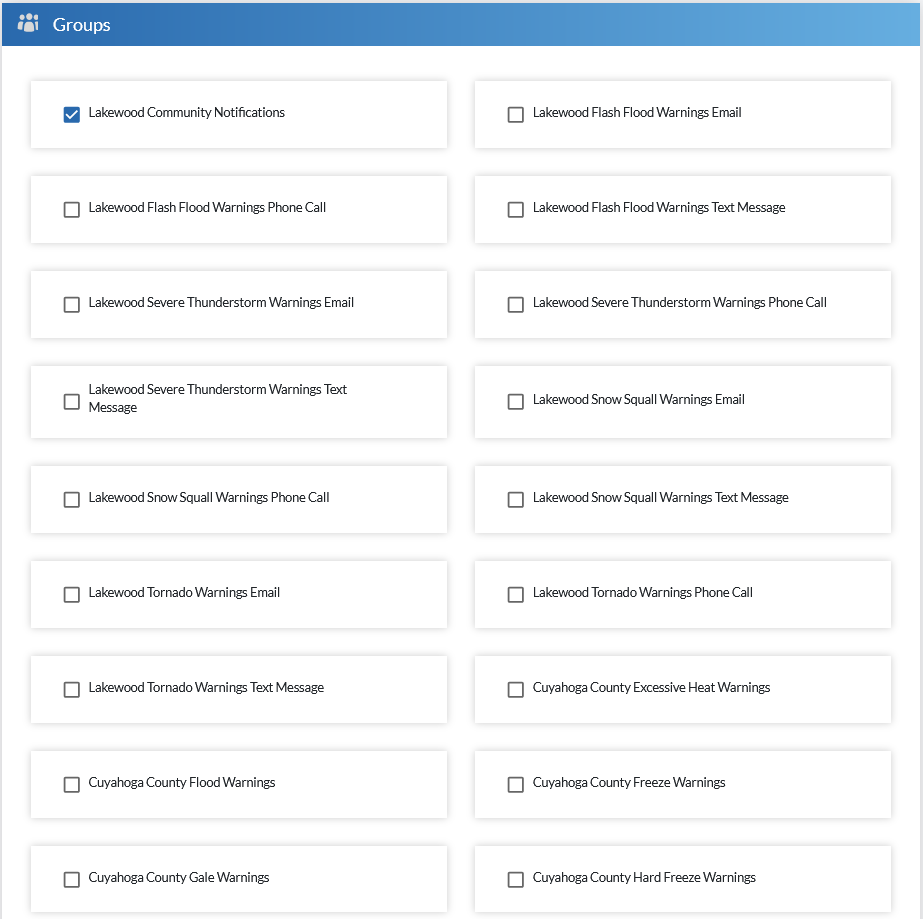
Finally, choose which notifications and methods that you would like to receive. You can choose as few or as many as you would like.
Once you have completed the form, click “Save” in the bottom right corner.
To start, visit accountportal.onsolve.net/lakewoodoh. You will be taken to the login/registration page. Click the “Register” button on the right if you have never signed up, or you can sign in using the Sign In form on the left.
Next, enter your First Name and Last Name, and choose a Usernanme and Password. Then, check the boxes for the Privacy Policy and the “I’m not a robot” reCAPTCHA.
After choosing your username and password, you will be taken to a screen where you will fill out your personal details, preferred communication methods, add your home address, and choose your alert preferences. First, make sure that your name is correct. First and last name are required fields.
Next, you can add your phone number to receive phone calls or text message alerts. Click “Add Device,” and in the dialog box that opens, enter your phone number. If you opt into text alerts, the phone number must be a mobile phone.
Next, click the “Add HOME ADDRESS” button, and in the dialog box that opens, begin to type your address. Search results will automatically pop up; you can then click your correct address. Click “ADD” in the bottom right corner to save your address.
Finally, choose which notifications and methods that you would like to receive. You can choose as few or as many as you would like.
Once you have completed the form, click “Save” in the bottom right corner.